
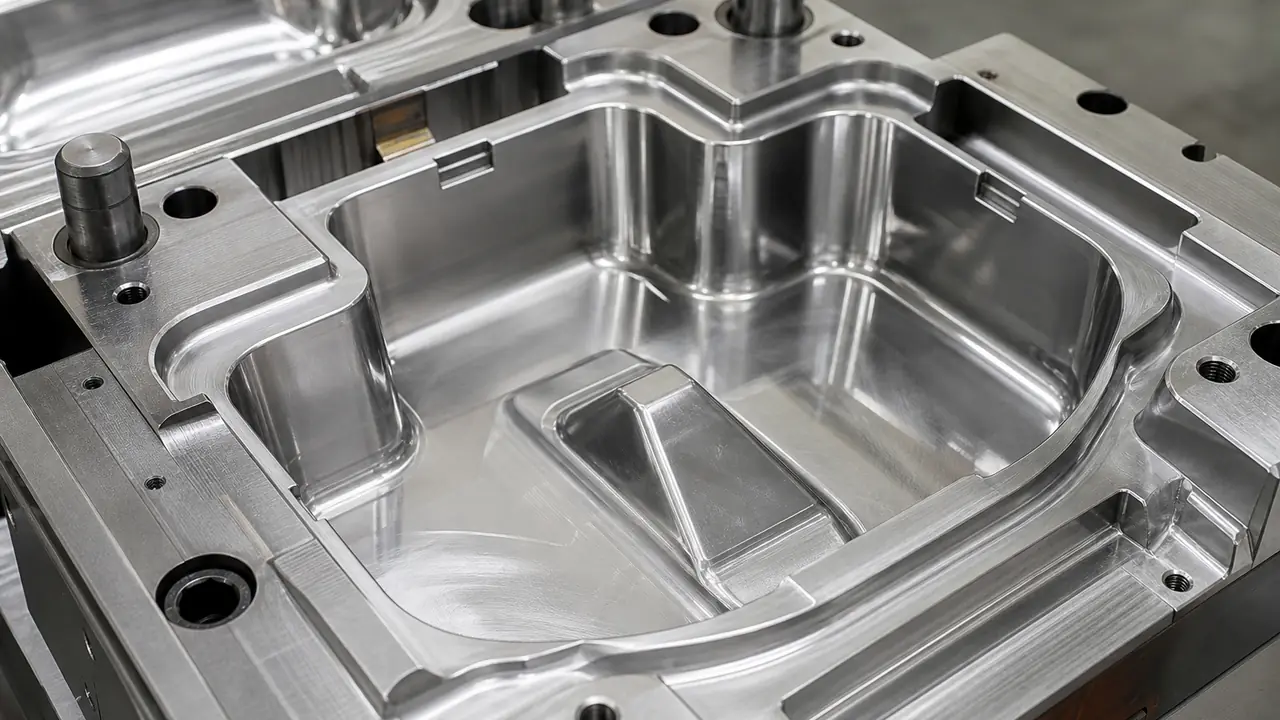
What draft is and why every container has it
Draft is the small taper given to any surface that slides against the mold as the part is pushed out. A container wall that was perfectly vertical would drag along the steel as it left the cavity, scuffing the surface, sticking to the core and sometimes tearing or deforming. With draft, the wall pulls away from the steel the moment ejection starts. The angle is set by the mold designer for each surface and stated on the mold drawing, in degrees; the right value depends on the depth of the wall, the material, the finish and the process.
For containers, draft has a second job that matters even more to buyers: it makes nesting possible. A tapered box or cup slides into the one below it, so hundreds of empty containers fit in a sleeve and a carton. Partner plants pack thermoformed PP boxes, soup cups and starch-PP blend bowls 200-300 sets per carton, and injection molded cups 300-500 per carton, because the walls nest. Straight-walled containers cannot nest and ship mostly air. Nesting is covered in stackability and nesting.
How a container leaves the mold
In injection molding, a container forms between the cavity, which shapes the outside, and the core, which shapes the inside. When the mold opens, the plastic has shrunk slightly onto the core, so the part grips the core and has to be pushed off. Several methods are used:
- Ejector pins push on the base or rim from behind. They are simple but leave small round marks and can stress a thin base.
- Stripper rings or plates push the whole rim off the core at once. Common on cups and tubs because the force is spread evenly and the rim is not deformed.
- Air ejection blows air between the core and the part to break the vacuum that forms under a deep, thin container.
In thermoforming, the formed sheet releases from the tool when vacuum is released and air is blown back, and draft lets it lift off without dragging. Whether the tool is male (the sheet is pulled over a raised form) or female (the sheet is drawn into a cavity) decides which side of the part is most accurate and which walls thin most. See thermoforming.
Draft and what the buyer sees
| Feature | Effect of more draft | Effect of too little draft |
|---|---|---|
| Side walls | Easy release, tight nesting, slightly smaller base | Scuffing, sticking on the core, distorted walls |
| Textured or matte surface | Texture survives ejection cleanly | Drag marks and shiny streaks across the texture |
| Ribs and dividers | Clean release, even cooling | Torn rib tops, sink marks on the opposite face |
| Stacking lugs and denest features | Defined stack height, easy separation | Nested parts jam and stick together |
| Inside of a deep tub | Lower ejection force, less vacuum | Base whitening or deformation on ejection |
The trade-off is space. More draft means the base is smaller than the rim, so a box that must fit a particular shelf, drawer or delivery bag loses some usable volume at the bottom. Fridge organizer bins and drawer trays, where the footprint has to match a fixed space, use less taper than takeout boxes, and the mold designer compensates with polish and ejection layout.
Texture needs more draft
A textured or matte surface is made of tiny peaks and valleys in the steel. As the part slides out, those peaks catch on the plastic, so textured walls need more draft than polished ones, and deeper textures need more again. If a design calls for a matte finish on the outside of a deep storage box, the draft has to be agreed at the drawing stage; adding texture to an existing mold without enough draft produces drag marks along the walls. The desk records the finish and the draft together on the specification for this reason.
Undercuts, snap beads and hinges
An undercut is any feature that would lock the part in the mold if it were pulled straight out: a snap bead on a lid, a clip, a side hole, a handle recess. Undercuts are released either by moving parts in the mold, such as slides and lifters, or by bumping off, where the part flexes enough to pop over a small undercut as it is ejected.
PP is flexible enough that small snap beads on lids and rims are often bumped off without slides, which keeps container molds simpler. The size of the bead is a balance: a larger bead gives a firmer lid closure but needs more force to eject and may whiten or deform the rim; a smaller bead ejects cleanly but holds less firmly. That balance is one reason lid fit has to be checked on the T1 sample rather than assumed from the drawing. Living hinges on PP clamshells and flip lids are a related case: thin, molded with the flow running across the hinge, and checked with repeated opening on the sample. More on lids is in lids and seals.
Nesting without sticking
Draft that is too generous or too even can cause the opposite problem: containers nest so tightly that they stick together, especially clear PET or thin PP parts. Denest features stop this. Small lugs, steps or ribs near the rim hold each container a fixed distance above the one below, leaving an air gap that lets them separate. A stack that jams on a restaurant line or a packing table is a real complaint, so the denest feature belongs on the drawing for any nesting container. See nested containers sticking.
What to agree before the mold is cut
- The outer size and the minimum usable base size, if the container must fit a space.
- Draft per surface, shown on the mold drawing, considering the finish.
- Undercuts and how each one is released: slide, lifter or bump-off.
- Ejection method and where ejector marks are accepted.
- Denest features and the target stack height per sleeve.
- Lid fit, hinge and nesting checks at the T1 trial.
The full trial sequence is in sample molds and T1 trials. New molds typically start from 50,000-100,000 pieces per item, confirmed in writing per program; see MOQ and lead time or send the drawing through the quote form.